layout wizard
The layout wizard enables you to create a new layout by entering the paper size, the label size, margins, spacing, and other measures, guiding you through the entire process.
The wizard is divided into 6 simple steps:
|
To be able to properly create a layout through this wizard you will need to know:
Note: |
|
Define the paper orientation, based on your needs. Note: |
|
|
|
|
|
Margins and gaps mutually influence each other to ensure that the label size previously defined is honored. For instance, when you change the horizontal gap, the left and right margins get adjusted accordingly to ensure that the label width entered is preserved, and vice versa. If a value that exceeds the available space is entered, an error message is shown and it will not be possible to proceed to the next step, until the error is corrected. |
|
Once you are ready to create the new layout, click the Ok button to apply the newly created layout to the current job. Make sure you save the file to retain all the information. Note: |
 The first step lets you decide if you want to define your layout by entering measurements or search Labeljoy's layout library, which consists of more than 11,000 predefined layouts by the most common label manufacturing brands.
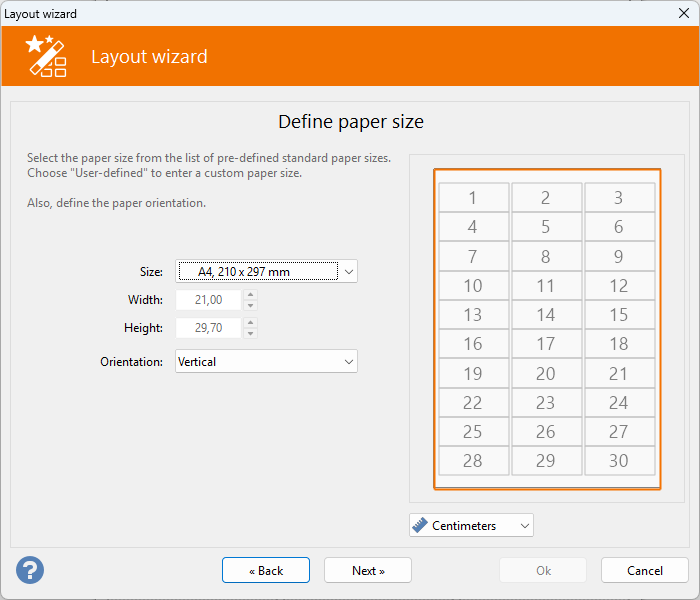 The second step lets you enter the paper size and its orientation, select a pre-defined paper size from the list to automatically enter the width and the height of the paper or select the first item User defined to manually enter a custom size.
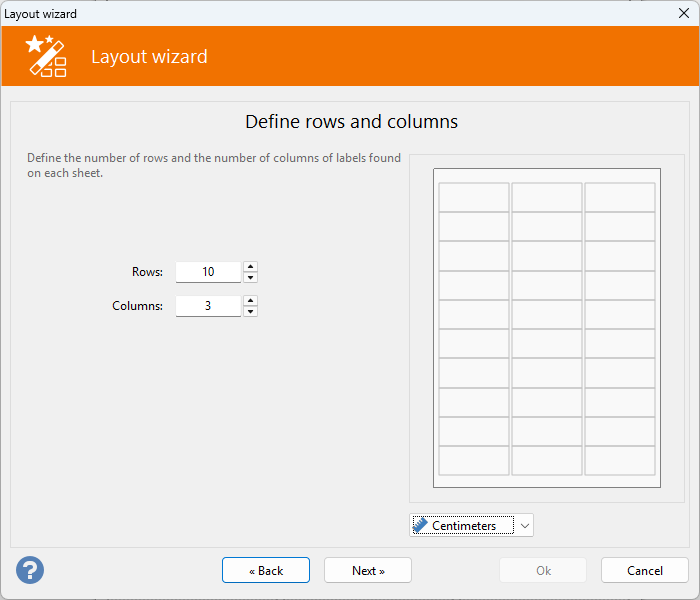 The third step is where you enter the number of columns and rows that make up the grid of labels of the paper. Rows refers to the number of vertical positions, while Columns to the number of horizontal positions.
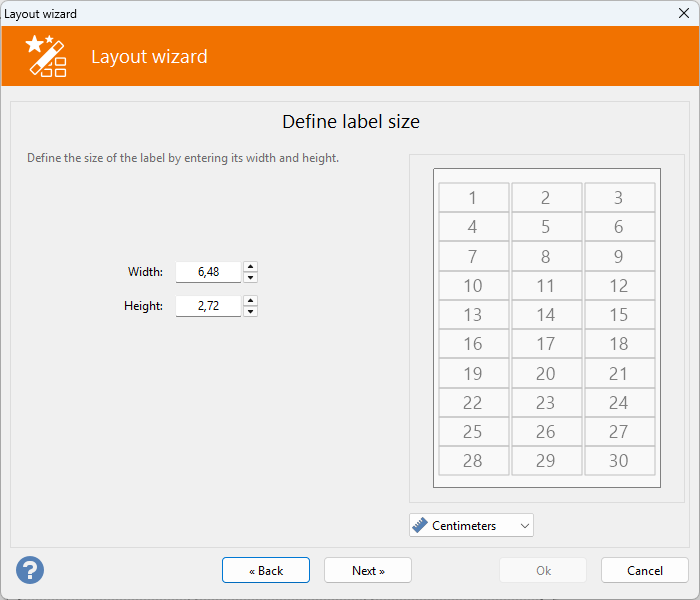 The fourth step lets you enter the label size. The maximum amount that can be entered here is limited by the number of rows and columns and the paper size, defined in the previous steps. If the size exceeds the available space, an error message is shown and it will not be possible to proceed to the next step, until the error is corrected.
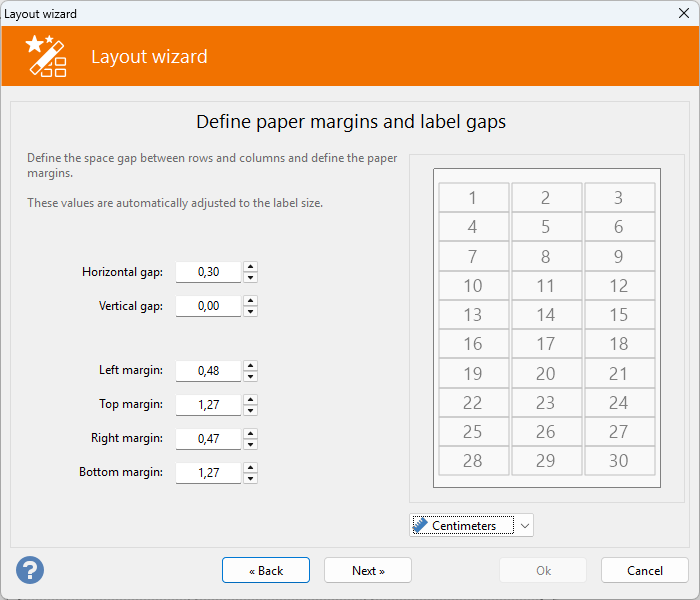 The fifth step is for defining paper margins and spacing between each row and each column of labels. Each gap value gets disabled when you only have 1 row or 1 column of labels, as it does not apply.
 The Sixth and final step lets you define additional information about your labels, such as the shape and 3 text fields that get pre-filled by the wizard to better identify the type of layout being created. This information is optional and can be freely modified.